


All-in-one meeting room & classroom AV system -- 2 HDMI inputs
Unfortunately, technology in classrooms and conference rooms is often more frustrating than effective. The headache begins at the design stage—random parts need to be pieced together to form some semblance of a system. The headache continues into the purchasing stage—technology is expensive, often costing multiple thousands of dollars per room. Installation is just as painful—those random parts now need to be connected together, and extensive programming is required to make them operate as one. And then the head explodes—the system is too daunting for the presenter, so they let it sit unused.
Thousands of dollars and countless hours are wasted by the users of the rooms who opt to ignore the expensive technology around them. Â
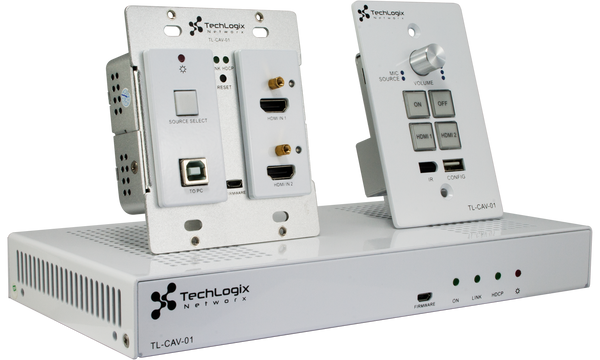
Enter the TL-CAV-01 room kit. We’ve designed the system to be affordable, easy-to-install, intuitive to use, and powerfully effective as a presentation and room audio-visual signal management tool. The system includes both audio and video routing and control, and only requires a single twisted pair cable to connect all of the components. Best of all, a simple wallplate controller provides users with volume control and source selection, and automatic modes of operation ensure the system will be used and not feared. The single TL-CAV-01 part number replaces hours of design and installation work, and the all-in system price is unrivaled in the education and corporate AV technology markets. Â
- Technical Features
- Resources
- Accessories
- Installation
- FAQ
- SKUs
-
- (1) included wallplate transmitter
- (1) included wallplate controller
- (1) included surface-mount receiver/processor
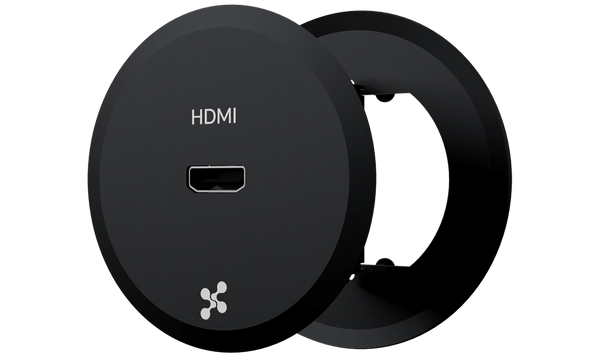
- (2) HDMI source inputs
- Automatic switching with connection sensing
- Manual control via IR and RS232
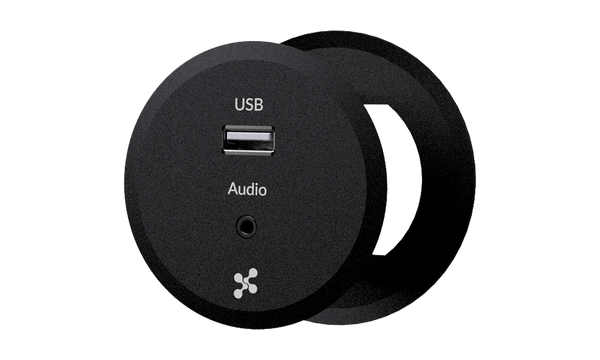
- USB pass-through for interactive whiteboard integration
- Single twisted pair connectivity
- Mic/line input with 48V phantom power
- HDMI output with audio de-embedding
- Built-in 2x20W 4Ω amplifier
- TCP/IP connectivity for system wide monitoring and diagnostics
- Firmware upgradeable via USB thumb drive
- IR learning for control of connected devices
-
Specification Sheet
Design and Installation Guide
Manual
Product Video
Design Help
Installation Help
Update Procedure
Update Files -
- 1. Install a single gang wallbox for the wallplate controller. It is recommended that the wallbox be at light switch height and in a location that’s easily accessible for increasing/decreasing volume and selecting inputs.
2. Install a double gang wallbox for the wallplate transmitter. It is recommended that the wallbox be near the source devices, such as laptops, computers, media players, DVD players, and document cameras.
3. Mount or position the surface-mount receiver/processor in its permanent location.
4. Run a twisted pair patch cord with RJ45 connectors from the single gang wallbox to the double gang wallbox.
5. Run a second twisted pair patch cord with RJ45 connectors from the double gang wallbox to the surface-mount receiver/processor.
6. Connect the wallplate controller to the twisted pair patch cord and install in the single gang wallbox.
7. Connect the wallplate transmitter to the both twisted pair patch cords (one from the single gang wallbox/controller and one to the receiver/processor) and install in the double gang wallbox.
8. Connect surface-mount receiver/processor to the twisted pair patch cord.
9. Connect 4 ohm speakers to the amplifier port on the surface-mount receiver/processor.
10. Optional steps:
*** Connect a microphone or voice lift system to the Mic Input port on the surface-mount receiver/processor.
*** Connect an interactive whiteboard and/or computer to the USB ports on the wallplate transmitter and surface-mount receiver/processor.
*** Connect the IR and RS232 control ports of the surface-mount receiver/processor to the connected source and destination devices.
*** Input the IR or RS232 commands for connected source and destination devices into the wallplate controller (see the Installation Guide for specific information).
11. Connect the power supply (included in the package) to the surface-mount receiver/processor.
12. Connect the power supply to an AC outlet or power source.
13. Connect up to two source devices to the wallplate transmitter using HDMI cables.
14. Adjust volume levels and select inputs using the wallplate controller.
-
What comes in the package?
Each TL-CAV-01 includes a wallplate transmitter, a wallplate controller, a surface-mount receiver/processor, power supply, two wallplate covers, mounting hardware, an RS232 control cable, and a USB cable.
Is there an app for control?
No, but you can launch our web interface from the home screen of a mobile device. Here's a guide.
What’s the max length of HDMI cable that I can connect to the wallplate transmitter or receiver/processor?
It really depends on the cable type and quality. Typically, we recommend using a twisted pair or fiber optic extender set for cable runs longer than 50 feet.
Do I need to power the unit?
The only component in the TL-CAV-01 kit that requires power is the receiver/processor. The wallplate transmitter and wallplate controller receive power from the receiver/processor through the connected twisted pair cable—no additional power supplies are required.
What does “automatic switching with connection sensing†really mean?
Automatic switching with connection sensing refers to how the TL-CAV-01 selects and shows content on the display. For example, there are two separate inputs on the wallplate transmitter allowing two separate source devices (typically laptops, computers, tablets, media players, DVD players or document cameras) to be connected simultaneously. When someone physically connects their source device to an HDMI cable connected to the TL-CAV-01 wallplate transmitter it will “sense†someone connected and automatically switch to that channel, thereby showing the source device’s information on the display.
That’s great, but how does automatic switching different from traditional switching?
Most systems require “manual switching†through a remote control, the buttons on the switcher itself, or a stand-alone control system. They will not sense a connection and switch to the channel.
That makes sense, but I kind of like the idea of manually switching channels so I know exactly which device is showing on the display.
That’s fine…the TL-CAV-01 also facilitates manual switching through the included single gang wallplate controller.
Let’s go back to the automatic switching…what happens if multiple source devices are connected at the same time and we want to switch channels? I thought you need a physical connection for the switcher to “sense†and switch?
Correct…sort of. When in an automatic switching mode, the TL-CAV-01 requires a physical sync in order to switch channels. The most common sync signals are generated when a cable is plugged or unplugged—it’s actually part of the magic of the HDMI stream and the HDMI cables connecting devices. If you have multiple devices connected simultaneously (the TL-CAV-01 supports up to two) you will need to trigger a sync. The good news is a sync can be created without a physical plug or unplug. On computers, simultaneously hitting Ctrl + F7 typically forces a sync; therefore, the person who wants to show their device will hit Ctrl + F7. Computers do vary, so it’s probably worth familiarizing yourself with your device—sometimes Fn + F3, F4, F5, F8, F9 or F10 are necessary. Worse case, you can unplug the HDMI cable for three seconds and re-plug it in or control the TL-CAV-01 manually.
What happens if I am showing my content on the display and unplug my device?
The TL-CAV-01 will default to the other connected source device.
What is the de-embedded audio output for? I thought an HDMI output would send video and audio to my display?
The HDMI output on the TL-CAV-01 does send both audio and video to whatever display or device is connected. This works great if your display is a flat panel with built-in speakers; however, in some systems the display might be a projector or monitor without audio capabilities. In this case, the de-embedded audio output comes in extremely handy…digital audio is essentially decoded from the HDMI stream, converted to analog, and output on the terminal strip connector. A standard audio cable can then connect the TL-CAV-01 to an audio receiver, secondary amplifier, powered speaker, or recording device.
Do you manufacture audio systems like this?
Funny you should ask! We do, and we offer several different systems. Check out Products > Audio in our menu above.
What type of speakers can I use with the receiver/processor’s amplifier output?
The TL-CAV-01 is designed for use with 4 Ohm (also displayed as 4Ω) or 8 Ohm (also displayed as 8Ω) speakers. The system is most commonly used with two 4Ω speakers with 20W per channel.
What happens if I use other types of speakers?
Don’t….you risk damaging the built-in amp or speakers.
Ok, that’s great, but how do I wire a 4Ω system.
Good question, and it’s really pretty simple. Our installation guide (check the Resources link) has diagrams.
How many speakers can I connect to the receiver/processor’s amplifier output?
There’s not a limit on speakers, provided the speaker wattage doesn’t exceed the TL-CAV-01’s wattage. To ensure long-term performance and signal quality, we recommend limiting the total system wattage to 80% of the unit’s total capability (two 16 watt channels).
What type of cable do I use to wire the receiver/processor to the speakers?
We recommend a high quality 18, 16, 14, 12, or 10 AWG (gauge) speaker cable. The lower gauge the better performance and greater distance between the TL-CAV-01 and the speakers.
Is there a maximum recommended distance between the receiver/processor and the speakers in the system?
Typically, 4Ω or 8Ω systems require speaker cable lengths to be under 50 feet.Wire Size
4 ohm load
8 ohm load
22 AWG
6 feet max
12 feet max
20 AWG
10 feet max
20 feet max
18 AWG
16 feet max
32 feet max
16 AWG
24 feet max
48 feet max
14 AWG
40 feet max
50 feet max
12 AWG
50 feet max
50 feet max
10 AWG
50 feet max
50 feet max
What is the maximum cable length for the twisted pair patch cord that connects the wallplate controller, wallplate transmitter, and surface mount receiver/processor?
The maximum recommended distance between each component is 100 ft. The patch cables need need to be kept at or under this distance.
Do I need to purchase a premade twisted pair patch cable, or can I use the cable I already have?
We offer premade patch cables that are certified for performance, but you don’t need to use them. A bulk shielded twisted pair cable terminated with shielded connectors should work fine…provided the cable is Cat 5e, Cat 6 or better.
Is shielding on the cable and connectors really necessary?
Not necessarily, but it really stinks to pull your cable, seal up the wall, connect your devices and then realize you have electrical interference that is destroying the integrity of your signal. Lots of installations use twisted pair extenders with standard, unshielded cable; however, we don’t warrant the product or guarantee performance unless shielded cables with shielded connectors are installed. Call it a safety net to ensure your system works properly for years to come.
Seriously, is interference that big of deal?
You bet. Both electrical magnetic and radio frequency interference can wreak havoc on digital audio and video signals being transmitted over copper cables—and twisted pair cable (Cat 5e, Cat 6, etc.) is a copper-based system. Think of it as a giant antenna gobbling up all of the stray noise in your building. Shielded cable helps insulate the cable from the noise, and the shielded connectors help drain off any noise that’s collected—just make sure the shielding on the connectors is attached to the shielding on the cables.
Man, EM and RF interference sounds terrible. Is there anything else I can do?
Absolutely…1) run your twisted pair cable in its own conduit; 2) keep electrical cables at least 1 ft. or 0.3m away from the twisted pair cable, and if you have to cross cables make sure to do so at a 90 degree angle; 3) don’t bundle the twisted pair cable with other cables that are carrying voltage (this includes electrical cables, speaker cables, and control cables).
-
TechLogix SKU# 1002-9801